How To Plug A Tubeless Tire
The ability of a tubeless bike tire to self-seal the majority of punctures encountered while riding is amazing, and just one of the advantages that tubeless setups offer. Tubeless “seal ups” often go entirely unnoticed, with only a slight drop in tire pressure the sole indicator that a puncture even occurred. However every now and again you might experience a puncture just a bit bigger than what the sealant can handle. Rather than defaulting to installing an inner tube in this situation you can also use a tire plug. Light, efficient and simple to use, tire plug kits should be an essential part of any tubeless rider’s flat kit and we’ll show you how to use them.
What is a tubeless plug?
Automotive tire plugs have existed for decades and decades and the tubeless bike tire plug is essentially a much smaller version. The plug itself is a small strip of soft vulcanized rubber that is designed to be inserted directly into the puncture, sealing it up. The plug then remains in the tire. As long as tire pressure is solid and remains reliable, the plug can last until the tire wears out. A few different tools exist to get the plug inserted into the tire but the process and the plugs themselves are essentially the same and relatively simple. The process also carries over to whatever type of tubeless tire you’re riding. Whether you’re on an MTB, gravel bike or even tubeless road setup, you can use the same tools and method.
How-to
As mentioned, the process of plugging a tubeless tire puncture is pretty simple and can be done quickly and with minimal mess. The rubber plug strip is inserted into the puncture (ideally with some air still in the tire) with an insertion tool. A portion of the plug strip should remain outside the puncture hole. The insertion tool is then removed, leaving the plug in place to seal the puncture. You might need to hold a finger against the plug while you remove the insertion tool but the plug should stay in place.
After the insertion tool is removed, air the tire back up with your pump or CO2 inflator and you’re good to go! Once the tire is inflated and reliably holding air, you can trim off the ends of the plug. You don’t absolutely have to trim the plug but the “tails” can flap around as the wheel rotates, hitting the frame stays, etc.
Tubeless Trouble Tools
Most tubeless tire plug kits include several rubber plug strips and an insertion tool. The simplest plug tools resemble a small screwdriver with an eyelet hole at the end. The plug strip is threaded through the eyelet after which you fold it in half and then press the tool/plug into the puncture. You won’t need to insert the tool too far and you’ll have some of the plug still sticking out of the puncture hole.
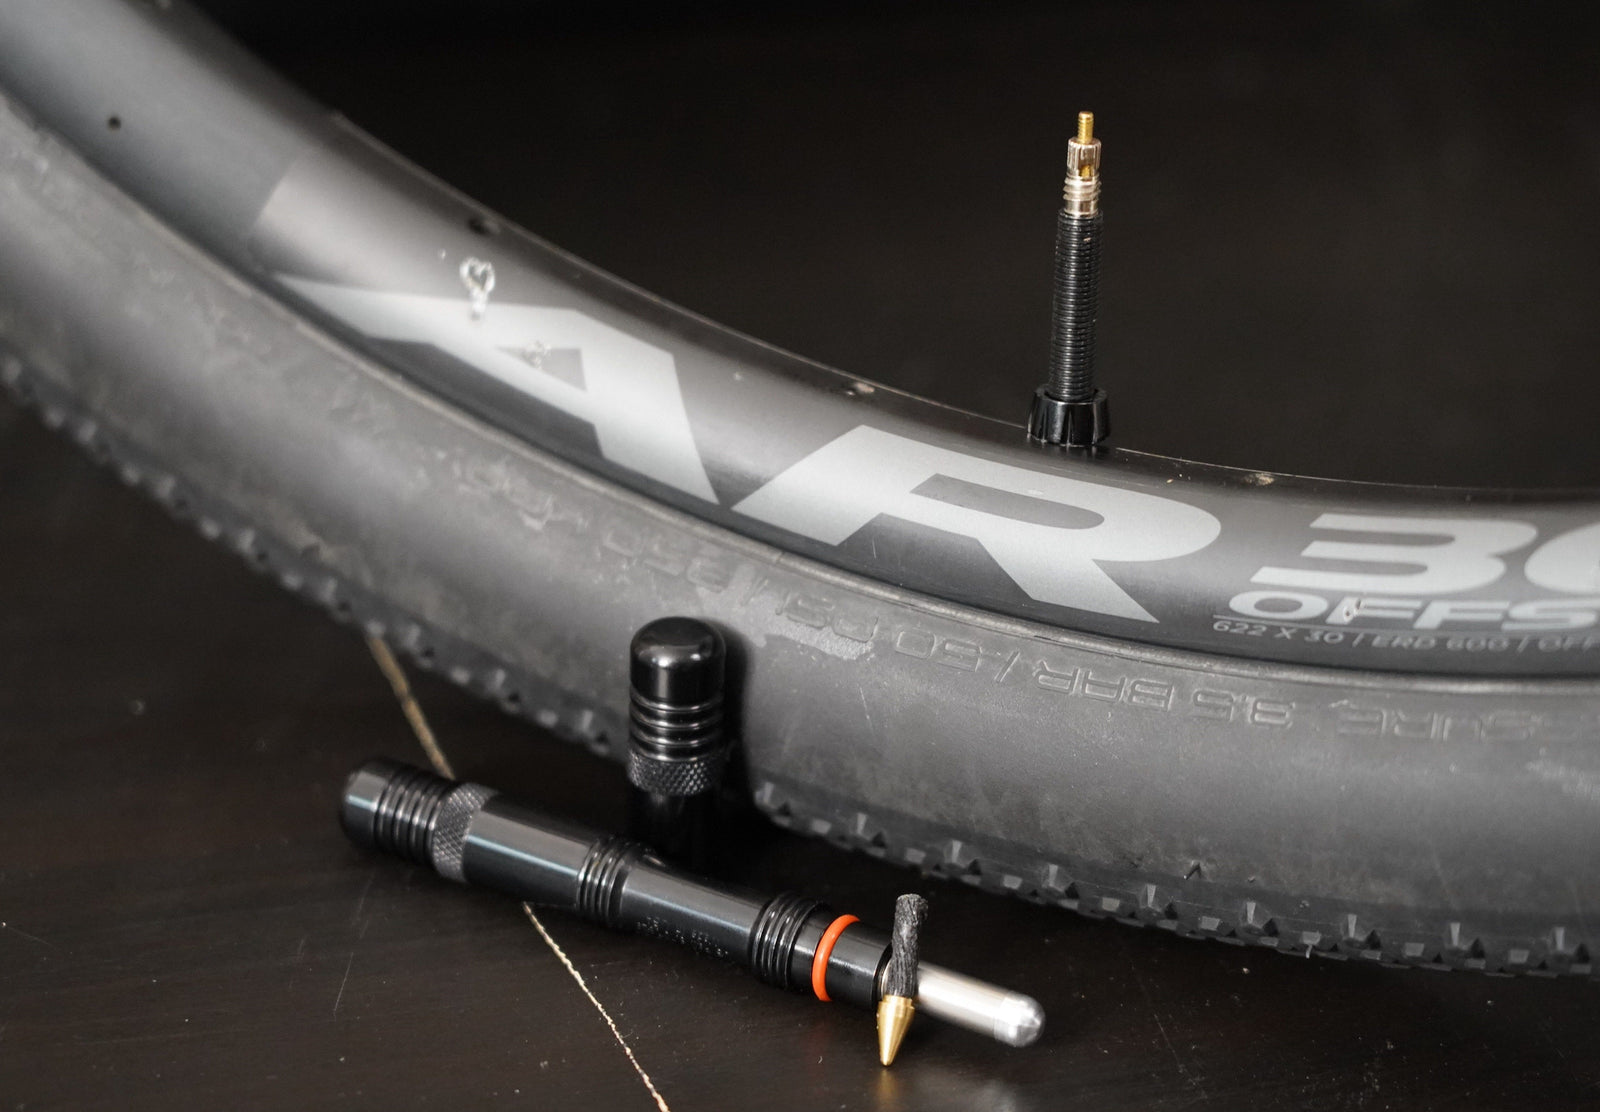
Other slightly more advanced tools and kits are available as well and are intended to make the plugging process easier and more efficient. These tools/kits include the Blackburn Plugger, Stan’s Dart and the Dynaplug. These tools can indeed speed up the plugging process, saving precious time while air leaks from the tire. These three plug tools all operate along the principles outlined above but the exact mechanics of these various tools differ a bit.
The Blackburn Plugger is the simplest and most basic of the three tools mentioned above. You can “pre-load” the pronged insertion tool with up to two plug strips and thread it back into its carry case (which can be strapped to your top tube for quick access). In the event of a puncture, you can quickly un-thread the plugger from its case, jam the pre-loaded plug into the puncture, remove the tool and air up. Quick and easy!
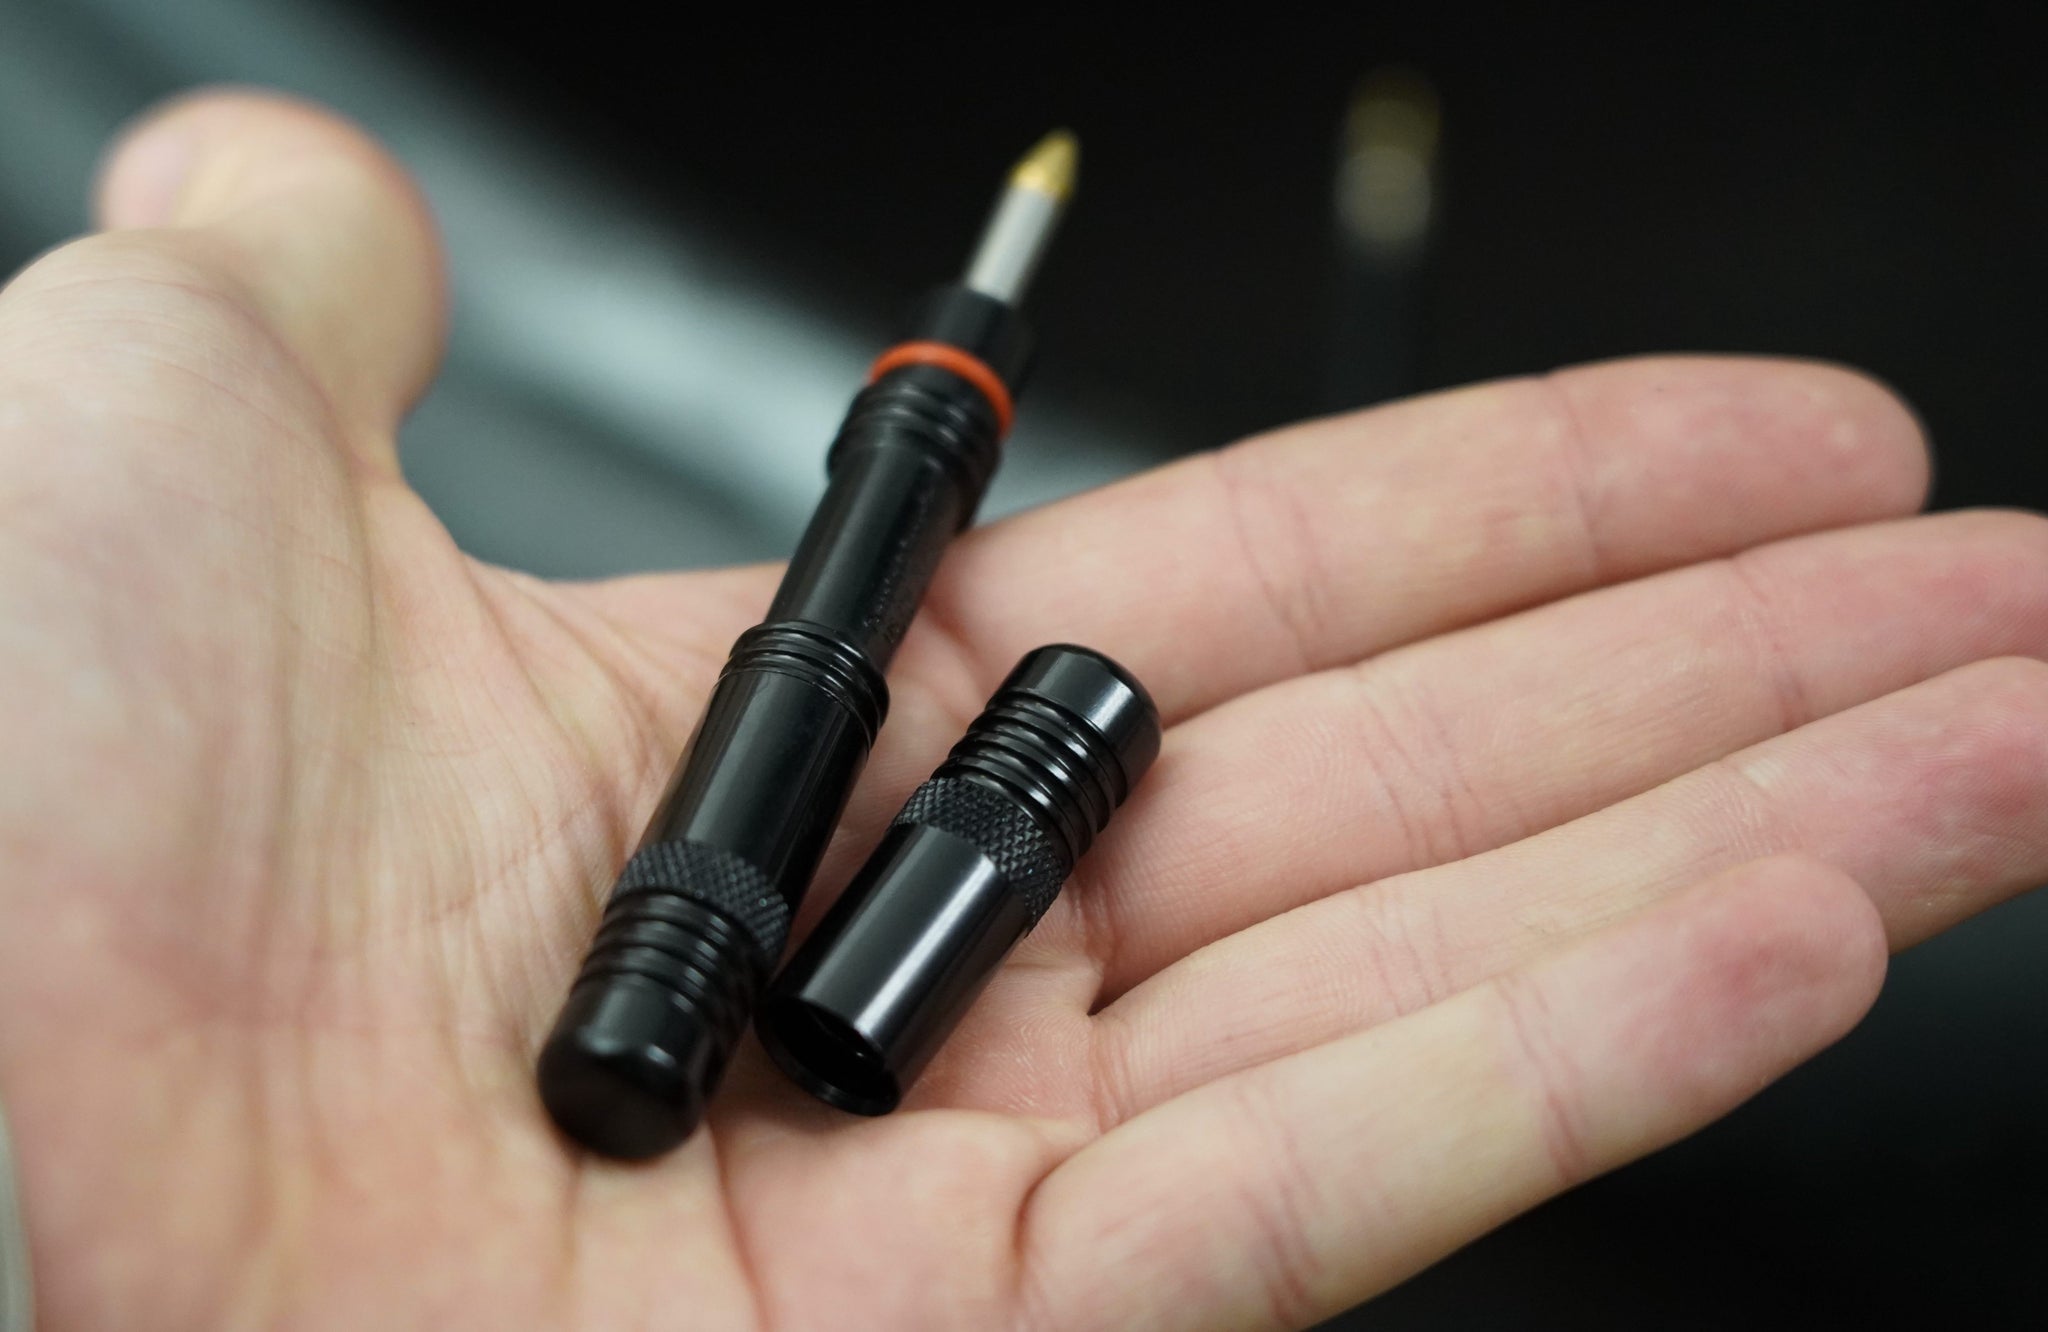
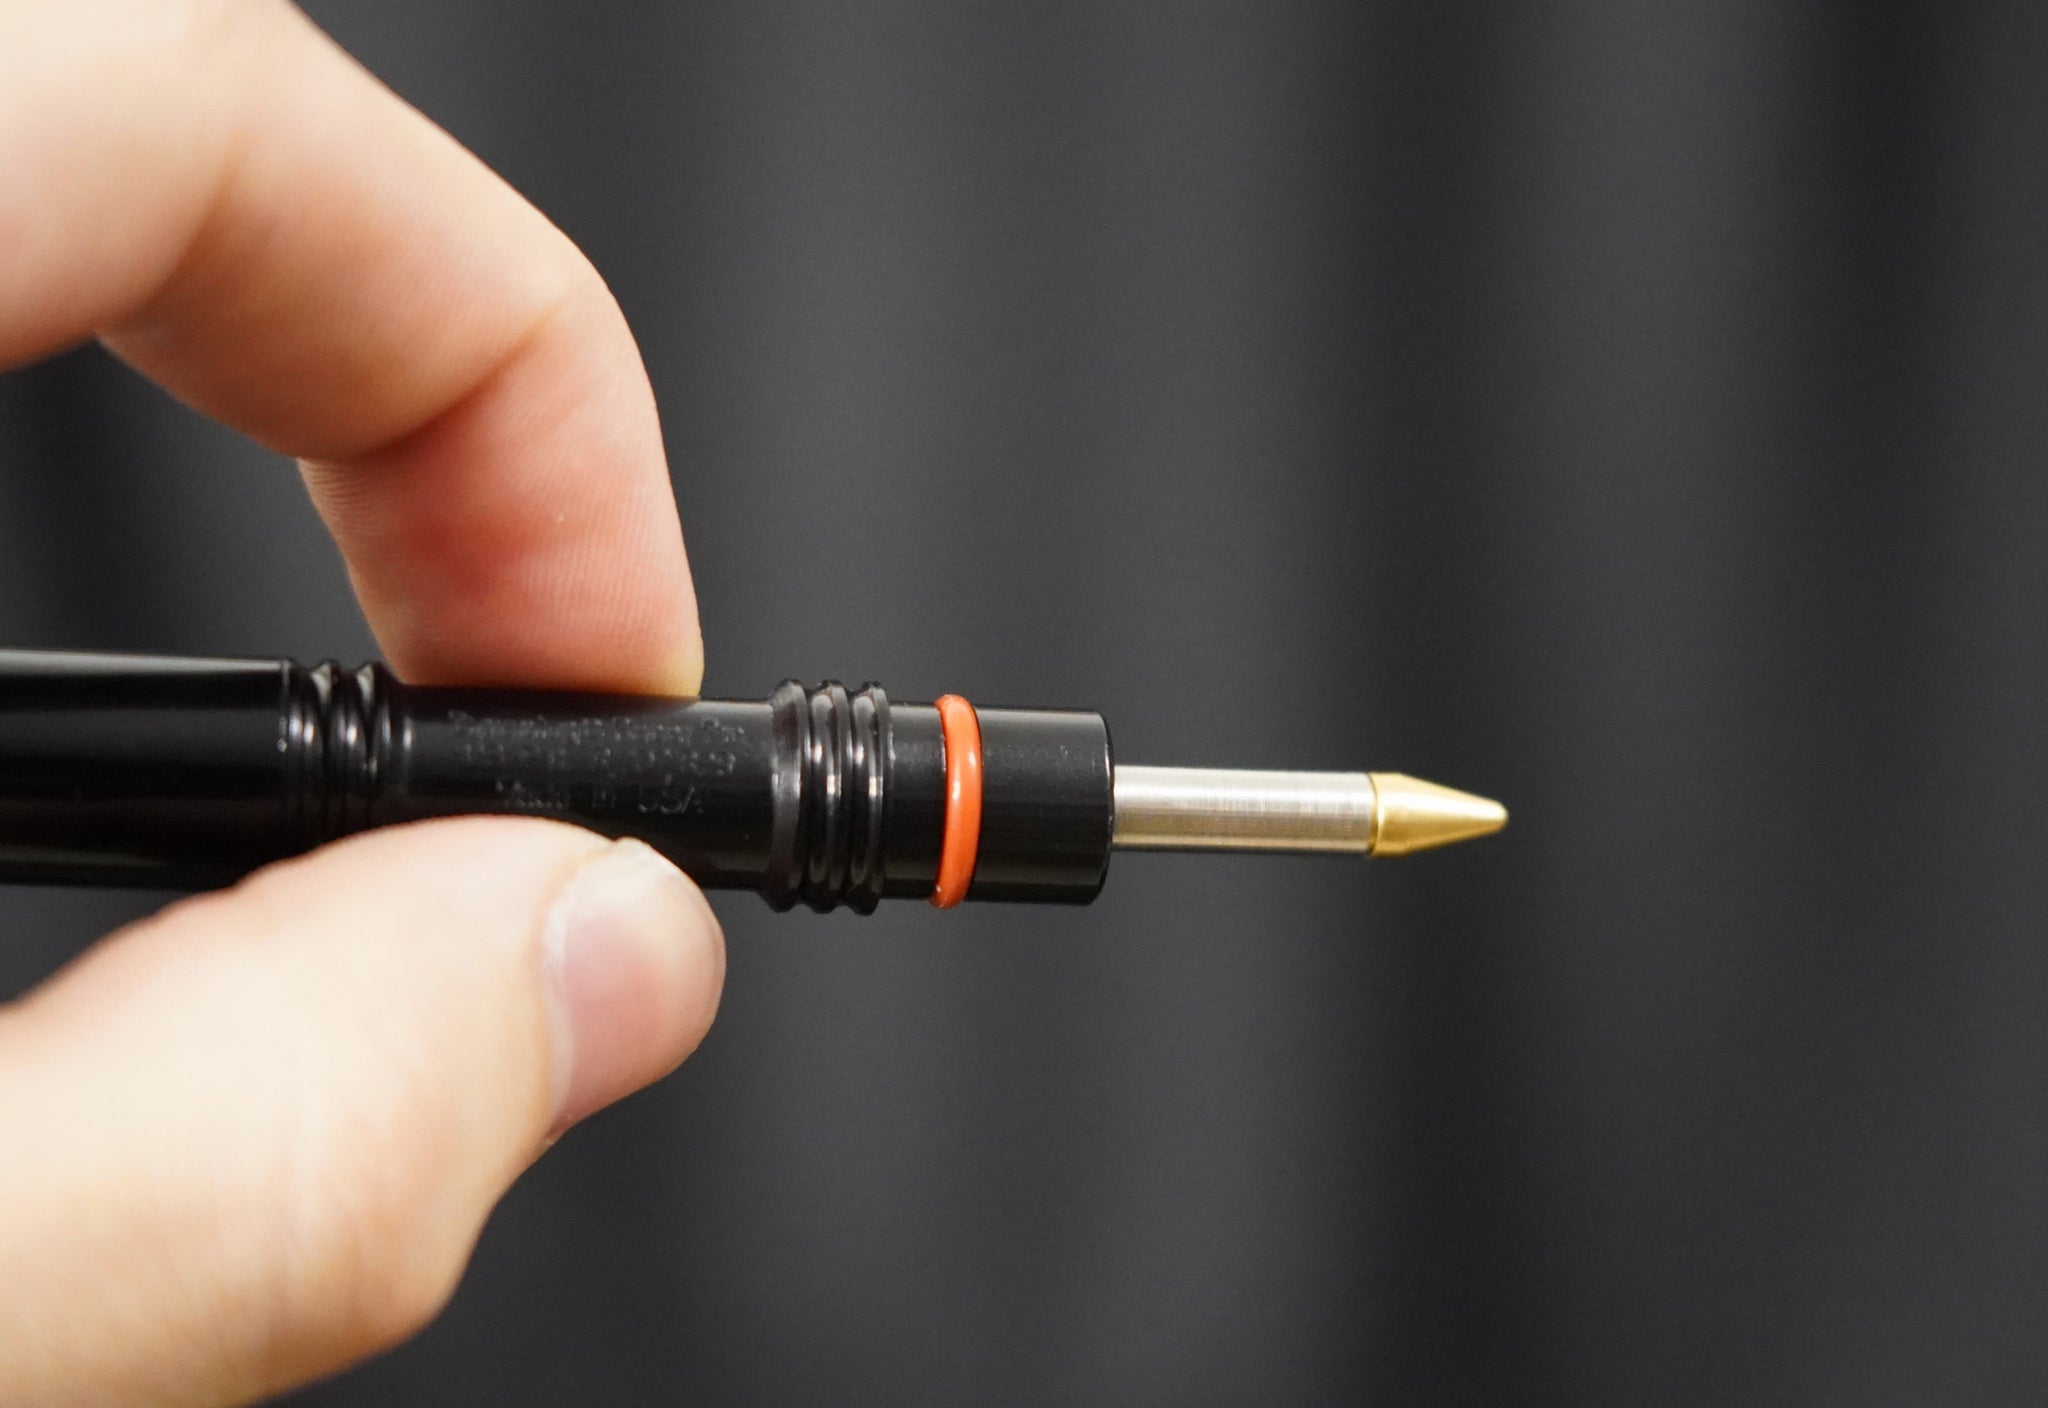
The Dynaplug functions much the same way as the Blackburn Plugger in that the tool itself inserts a plug into the puncture and then the tool is removed. The plugs themselves are different though, consisting of a proprietary rubber-impregnated cord connected to a non-abrasive brass tip. The plugs are inserted into the insertion tool’s stainless steel tube. The stainless tubes that house the plugs are then threaded into one of Dynaplug’s applicator tools. The insertion process and tool removal are the same as the tools mentioned above, with the rubber plug and its associated brass tip remaining in the tire. The brass tip will not cause any damage as it resides in the tire. It may rattle a bit but can be left alone until the tire is replaced or serviced for some other reason. Dynaplug includes 2 sizes of repair plugs (and corresponding tips), one larger than the other for larger punctures.
The Stan’s Dart is a little different from the others… The plugs deployed by the Dart tool are more of a “feather” of treated rubber, rather than a strip. The tool uses a barbed plastic tip through which the chemically treated rubber plug is pre-threaded. The tool/plug is inserted into the puncture until the barb “catches”, then you remove the tool, leaving the treated plug to fill the puncture. The big difference is that the treated plugs are designed to chemically react with Stan’s brand sealant to completely seal the puncture, rather than relying simply vulcanized rubber to form the puncture seal. Once the Dart tool is removed, the remaining exposed “blossom” of the rubber plug will wear away as the tire rolls and nothing more needs to be done.
The Dart is an easy, efficient plugging option *if* you’re using Stan’s brand sealant in your tubeless tires. Stan's No Tubes states the plugs will not work properly unless you are using their plug in combination with their sealant. We have not always found this to be the case but this is the recommendation of the manufacturer.
Things to keep in mind
The plugs/tools are easier to insert into the puncture if the tire still has some air in it. The more air you can keep in the tire while getting the plug ready, the better. Some riders keep a plug threaded through the insertion tool at all times to help save time when getting the process done.
Some punctures might require a couple of plugs. This is ok (aside from the Dynaplug; use the larger plug in this case), and one can be inserted after the other. Three plugs is usually considered the maximum though, and if it looks like the puncture is a 3 plug + affair, it’s best to install a tube to finish the ride. At this point the tire is most likely at the end of its road.
Too big to plug? Repair alternatives
As great as tubeless systems are at mitigating punctures and keeping you rolling, there are the rare less-than-less-than optimal scenarios where a puncture is too big to plug. Installing an inner tube in the tubeless tire is standard procedure in these cases, and one should always carry a tube even when using a tubeless setup. If you experience the really unfortunate situation where even an innertube won’t stem the purge, say for instance a sliced sidewall or remarkably large hole in the tread, there are a couple of semi-last ditch methods you can employ before you hail the “team car”.
Emergency tire boots are in essence larger, heavy duty patches that go on the inside of the tire (as opposed to the patches we’ve all seen and used on inner tubes). Designed to repair slices or worn side walls, products such as the Park Tool TB-2 Emergency Tire Boot can work in a pinch, but may not adhere very well to the inside of the tire unless almost all of the sealant is cleaned away. Combined with an inner tube, a tire boot can usually at least get you home.
As a very last resort, you can try setting a “static” (i.e.: not glued in place) tire boot using a spent gel pouch, folded up energy bar wrapper, or available denomination of cold hard (paper) cash. If it works, the last option may turn out to be the best money you’ve ever spent. Plus, you can clean it off and spend it on drinks for the friends that slowly rode home with you.

What’s worked for you?
If you’ve had tubeless repair experiences you’d like to share or if you’ve used a tool or method we haven’t discussed, let us know! We’d love to add to the information bank and help everyone have the best tubeless experience possible. Drop us an email or reach out on the chat with any questions, or comments and let us know what we can do to help.